1932 Lanchester Ten Coupe
The Lanchester Ten chassis was very popular with coachbuilders and many pretty coupes were built. This model is an early version of the Mulliner Sports Coupe, it was registered in December 1932 and is the earliest car of its type known to the Lanchester Register.
The term ‘Sports’ had a different meaning to motorist in the 1930s, it often referred to the style of coachwork, not necessarily the performance capability of the car. This model falls into the first category, the mechanical specification is identical to the standard six light saloon car, the coachwork provides the ‘sportiness’.
I have had a liking for these cars for many years and have viewed a couple to buy – however either price or condition have put me off!
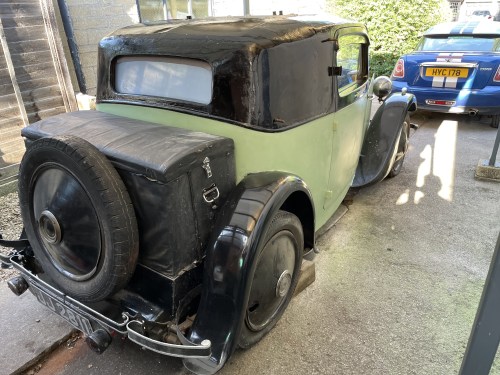
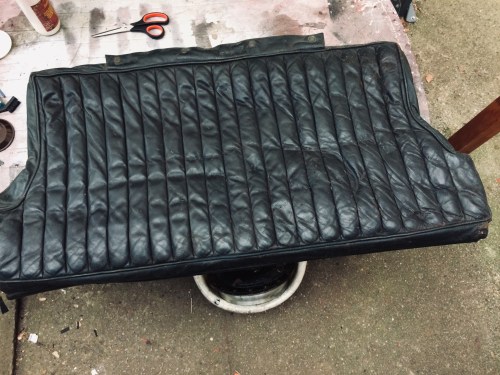
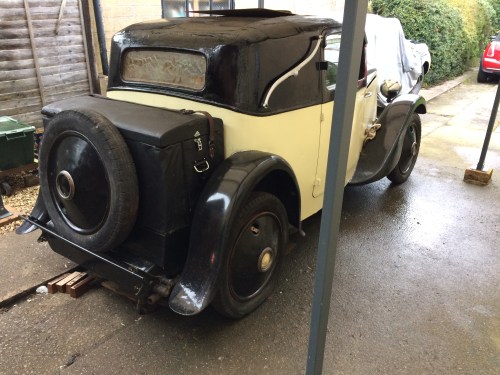
There are two distinct types of sports coupe, with several minor variations to keep keen spotters happy, the early cars like mine, have no running boards and were fitted with the full wheel embellishers you see in the photographs. The early models also sported a leather-cloth covered wooden trunk, on later versions the trunk had a more ‘built in’ appearance, unfortunately mine has succumbed to the ravages of time, luckily the fixings and other hardware have survived and are still with the car. In the photograph below thehe fuel tank is resting on the chassis, it actually fits below the scuttle seen at the rear of the car.

Fitted trunk has rotted away
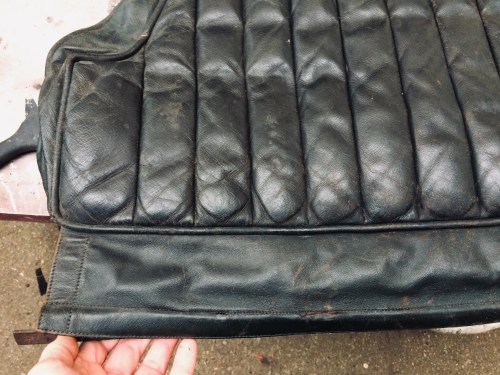
This Lanchester had been in the previous owner’s hands since 1966, and not run since the beginning of the 1970s. I became aware of the car through this website, the owner contacted me as a result of my appeal for one of these cars. The price was reasonable, and although the car clearly requires a lot of work, it is rust free and appeard to be complete. The leather is in surprisingly good condition and will only require minor repairs, cleaning and an application of hide food. The interior woodwork has been painted in a fetching shade of dark brown, but appears undamaged.

The leather is in remarkably good order
I was informed by the previous keeper that the car is mechanically good, except for the braking system, it apparently came off the road due to a burnt out valve.
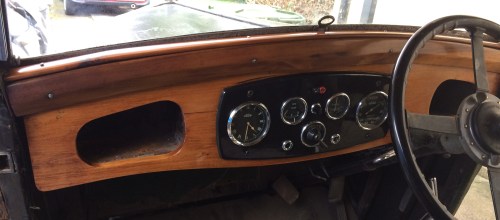
Initially I stored away the various parts removed from the Lanchester and immediately got togrips with the internal woodwork. The brown Dulux that had beenslapped on the interior wooden trim cleaned off well using a water based paint stripper. The trim has responded to deep cleaning and treatment with wood reviving oil. The many scratches and gouges that the wood has suffered have been made invisible by the application of many coats of external satin varnish carefully flatted between coats.

Unused for over 40 years
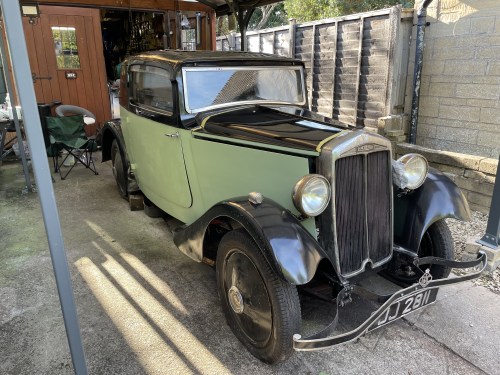
The Lanchester is a fixed head coupe with pram irons, the roof originally had a vinyl covering which has become detached since this photograph was taken.
Even though the paintwork is poor, the condition of the coachwork is remarkably good as can be seen in this photograph. Close examination has revealed no areas requiring the attention of the welding torch!
I bought the car sight unseen and managed to get it collected by Sterling Transport on a return load basis. This cost about £50 more than hiring a trailer for the 2 days it would have required to recover the car from Yorkshire to Frenchay. The Lanchester was delivered ten days later and was just as described.
My immediate plans were to preserve what I had without losing any original features. I checked over everything and could see that nothing vital appeared to be missing.
Once the car was safely stored in the garage I removed all of the wooden trim, it was almost black, and looked as if it had been painted with Dulux house paint!
I stripped every piece of wood and cleaned it down using wood bleach followed by a Cuprinol treatment that enriches the wood and enhances the colour. I then applied numerous coats of satin varnish, flatting back between each coat. Using this method I eliminated all of the scratches and the surface damage which the wood had collected over eight decades of use and abuse. I derive a huge amount of enjoyment from this labour intensive work. There is something very satisfying in the rather repetitive, yet progressively addictive, task of transforming a piece of apparently scrap timber into a thing of beauty.
The steel instrument panel had virtually no paint remaining on it so was also removed from the car. I stripped it back to bare metal and gave it several coats of black coach paint, which I later flattened with 1,000 grit wet and dry paper and lightly polished this gives to a satin finish that fits in nicely with the newly renovated woodwork.
The instruments were all cleaned down and checked for correct operation. The purchase of the primrose coloured Daimler LQ3/20, seen on another page of this site, then interrupted progress. The Daimler was a runner, but required more attention than anticipated!
The Lanchester remained unloved and neglected in the back of my garage for a year or more, until I made the decision to swap the cars around to get the Daimler inside, this had the effect of renewing my enthusiasm and work on the car restarted.
My next task was to remove the engine. The timing chain cover had already been removed , and I could see that one of the sprockets was badly worn. I purchased a new chain and sprocket, which I intended to fit once I had dismantled and inspected the engine and also planned to fit a new seal to the fluid flywheel.
Three of the engine mounting bolts freed off easily but the fourth bolt, the most awkward to access, would not shift. Its nut was rusted and all attempts at releasing it met with failure. Undaunted, I regularly soaked the bolt with penetrating oil. Several weeks later I enlisted the help of my son, and with an extra pair of hands on the job, the nut came off in seconds.
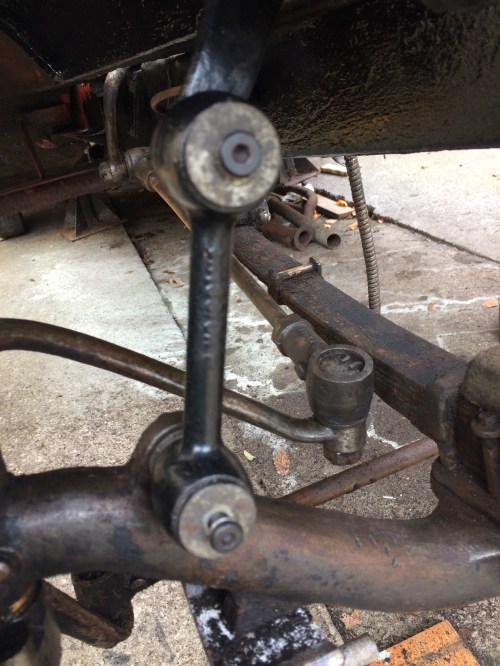
The engine is not as easy to lift out as it might at first appear. The rear off side engine mounting sits directly behind the steering box and prevents the engine from simply lifting up and out. My first instinct was to remove the steering box, and I even removed some of the fixing nuts before realising that I could extract the engine if I lifted, turned and tilted it.
When I bought my engine crane I also purchased a load leveller – this simple device, which allows you to tilt the engine at the turn of a handle, has been worth its weight in gold. The engine was soon resting on wooden blocks on and driveway and a few minutes later was separated from the gearbox. The fluid flywheel was then accessible and I set about separating the driving from the driven member. As a last minute precaution I pushed a drip tray below, just in case there were still a few drops of oil remaining in the flywheel. Imagine my surprise, when, as I released the fixings around the flywheel, half a gallon of oil poured out! Surprisingly the seal was still good after forty odd years of inactivity.
Cold, short winter days are not the best ones to carry out restoration work on a motor car, but I set myself a goal – to carry out one task every day. Some days this might be to simply paint a small bracket or clean a switch.
One job that I have been able to carry out indoors, and another that I find therapeutic, is taking care of the leather.
The Lanchester has small seats, and they were brought into the kitchen one at a time for attention.
I was fortunate that the upholstery in my car is in good order with just a few splits and tears, although woodworm, or some other moth larvae, had made a meal of the seats in a few localised areas! This damage was relatively light but very unsightly.
I cut pieces of cloth hooding material and glued them behind the holes and splits. I use Uhu contact adhesive, which seems to have a bit of working time and is very strong once cured.
Using a leather repair compound, I then filled the repairs to meet the surface of the leather. I purchased the filler, along with a clear colour setting fluid, from Leather Furniture Repairs. The filler has the consistency of clotted cream, and is easily applied with a spatula, or in the case of a larger split, a body filler spreader. The compound can be cured quickly using a hair dryer. I have never tried this, preferring to fill the defects, then leave overnight.
The repairs may be flatted back, if proud, using 1,000 grit wet and dry, or if the repair is too low, may be given another skim of filler.
After leaving for a few days to ensure the repairs were properly cured. I coloured them using a child’s water colour set. The green paint was too bright and had to be toned down with the addition of black. Trial and error, using progressively more green or black, and only tackling a small area at a time, and constantly remixing the paint to match the section I was working on brought amazing results.
Once again the leather was left overnight and the colour match examined when it was thoroughly dry. As the old leather has faded in some places more than others, some areas required more work with a darkened colour, but other areas were an almost perfect colour match. I then carefully applied the colour setting fluid to make the pigment fast. The results are nothing short of amazing. The following morning it was almost impossible to spot the re-coloured areas. The fixing fluid was applied and the following day the leather was treated with a leather balm. All that remained to do was stand back and admire the excellent results!
The leather does not appear new, but reminds me of a well cared for, antique, sofa. I think the leather looks nicer than new upholstery, and far superior to ripped and holed seating!
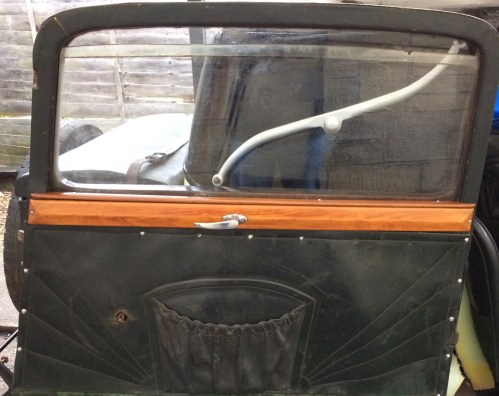
The door cards are also in original and usable condition, I have simply cleaned these and temporarily refitted them, the art deco sunburst pattern is lovely to see, it would be a shame to discard this in favour of a replica panel.
 During the winter of 2018/19 the Lanchester was parked up on axle stands under my newly installed, free standing, car port. Although the cold weather and short days slowed progress, the fact that the car could be easily accessed without pushing it out of the garage, or pulling off a cover, meant that many small jobs were tackled when only a few minutes could be spared.
The chassis, floor boards and rear steel floor pan have all been repaired and painted, a new rear window surround has been fabricated and varnished, and numerous dents and dings on the coachwork have been dressed and filled .
The stylish rear trunk had, long ago, collapsed under the strain of too many winters, luckily the previous keeper had kept most of the original fittings. In the long term I plan to make an accurate replica, but for the short term I have modified a home made trunk that had been fitted to a previous project. Whilst not a perfect replica, it is well proportioned and, as it is in used condition, matches in well with the coachwork.
Slow, steady progress is better than none, and the simple method of tackling a small job every day has meant that the following parts have been stripped, cleaned and painted: starter motor, dynamo, master and wheel cylinders, carburettor, voltage regulator and cylinder head, along with a host of other small parts.
Life unfortunately has a tendency to get in the way of hobbies and pastimes, and the plan to be on the road by the spring of 2019 did not come to fruition.
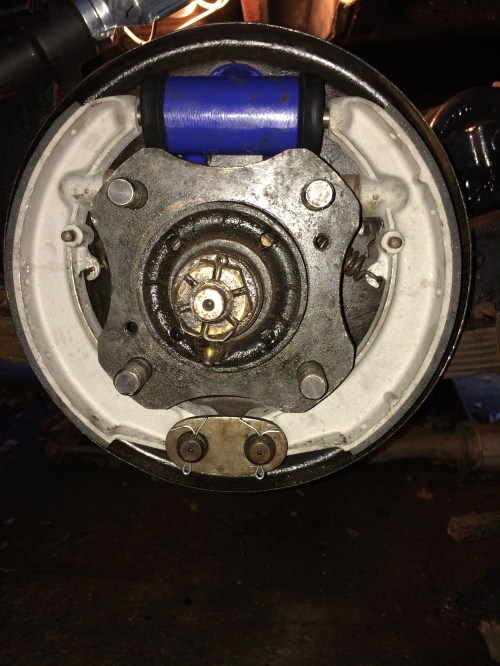
However as the car was easily accessible I managed to fit the relined brake shoes and the reconditioned wheel cylinders and carry out some major work to the car’s wiring. Wiring looms are nowadays available, ‘over the counter’ from several auto electrical outlets, however I prefer to make my own. Whilst the car was jacked up on the axle stands, I took measurements and transferred these to a sheet of A4 paper then drew my own wiring diagram. I purchased several different coloured spools of wire and two or three rolls of cloth insulating tape. Using my diagram for reference, I made several individual looms, one to run from the front to the back of the car, others to run from the voltage regulator to the instrument panel, and others to the front lamps.
Once the looms were made and taped, I fixed them in place, being careful to tuck them within the chassis and protect them in conduit wherever they were exposed.
Experience has taught me that it is a mistake to have more than one old car, especially if they are restoration projects. It is simply impossible to forward more than one project at a time, and even relatively good cars will soak up more time than you can imagine. Although long aware of this wisdom, I frequently find myself with several cars requiring serious attention, as well as a supposedly good runner. This happy state of affairs often leads to the good car being neglected, the first project receiving half hearted attention and the third being completely ignored. Space becomes limited, spare parts block in tools, and the garage becomes something resembling one of the homes featured on the tv programme American Hoarders.
Despite my best intentions this state of affairs came about during my ownership of the Lanchester. I already owned a nice Barker Special Sports and a very rough one which I had saved from the scrap man. Almost before I had closed the garage door on the Lanchester for the first time, I was offered a lovely Daimler LQ3-20. The car was in good condition but had not been in regular use. I could not resist it, unfortunately the Daimler required more work than was anticipated, and brought progress on other projects to a standstill.
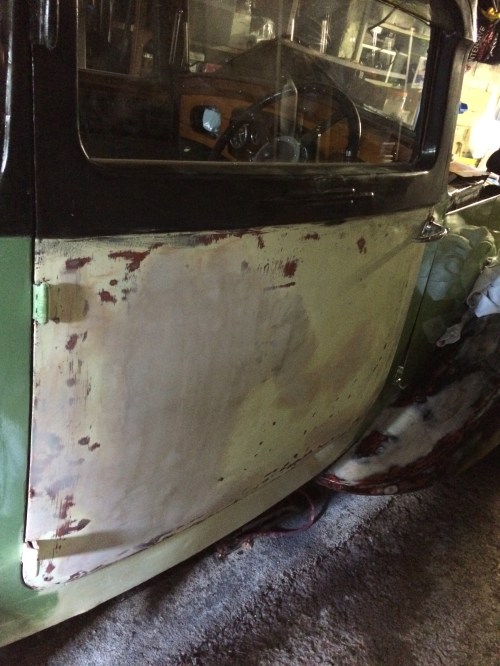
Having recommissioned the Daimler limousine I turned my attention, once again, to the Lanchester. Spending at least an hour every day, I concentrated on the coachwork. Decades of dry storage had ensured that there was virtually no corrosion, unfortunately the coachwork has received numerous dents, probably from bicycles, lawn mowers and whatever else had been stored in the garage alongside the Lanchester. These minot dints and scrapes have been tapped out and filled and the panels primed and in some cases painted. It is my intention to go over the whole car with new paint once all of the defects have been attended to.
My house is as old the cars I drive and decades of car restoration has resulted in a distinct lack of home maintenance. Being a Jack of all trades, and having an aversion to paying someone for work that I can do myself, I have subsequently spent hundreds of hours on kitchen and bathroom fitting. This method may have saved me thousands of pounds, but has come at the expense of almost total neglect to the Lanchester.
Once these essential home modifications and repairs were made, I moved the old cars around ( a tandem double garage with a car port in front means that the cars need to be frequently shuffled). I wanted to get the Special Sports under the car port and the Lanchester back into the garage along with the LQ3/20. The Special Sports engine rattled upon start up, and clearly required serious attention. The engine fault was a serious one and required a full engine out refurbishment. Once again the Lanchester was pushed to the back of the garage whilst other projects took priority!
Excuses seem to come thick and fast, but the truth is having more than one project can be one too many!
I reluctantly sold the LQ3/20 in order that I might concentrate on repairing the Special Sports engine. This little job turned into one of those sorry sagas you sometimes hear about, and soaked up more time than I would have imagined possible, but that’s another story!
The few days between Christmas and the new year are always quiet and yet I am somewhat unwilling to get stuck in to any serious business. As usual at this time of year I wandered into the garage and had a good tidy up. During this gentle exercise I also moved some of the Lanchester parts into better storage containers. I took the opportunity to clean some of them ready for refitting, which at the moment seems further away than ever!
Another year has passed and for most of the time I have the Lanchester has received liitle attention, although I have managed to get many of the dents on the offside of the car filled and flatted. I have achieved this by spending just an hour a day – one day filling, the next day flatting. It is surprising how this method moves the job along.
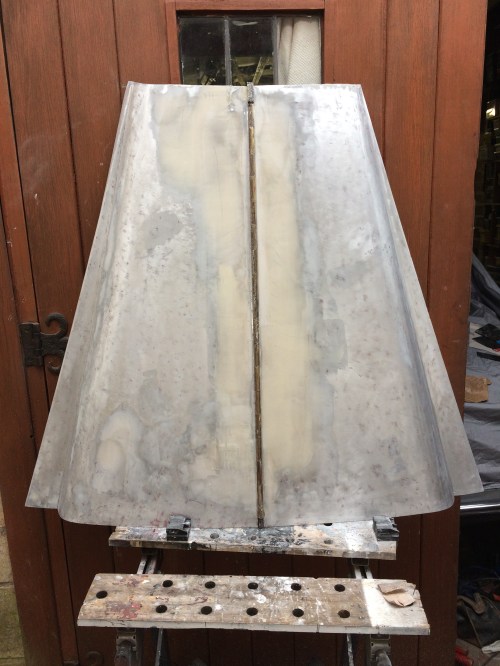
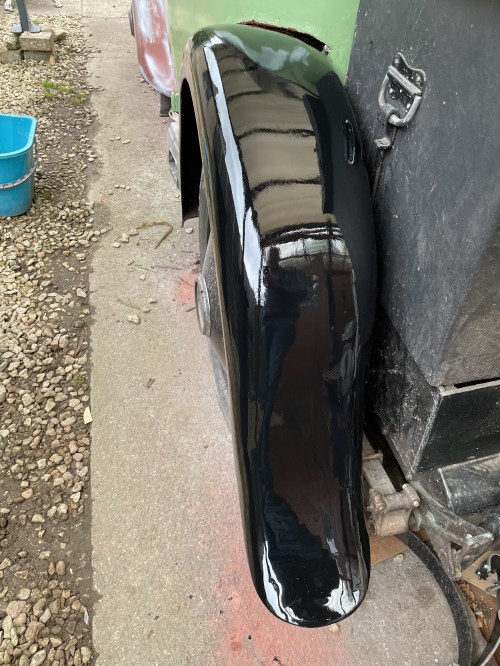
I suspect that the bonnet had been used as a shelf for garage and garden tools, the numerous dents received along the way have been tapped out, skimmed with filler and the bonnet has now painted black and has a pleasing shine to it! The engine cover side panels have also received attention and are now dent free and painted, although not yet polished.
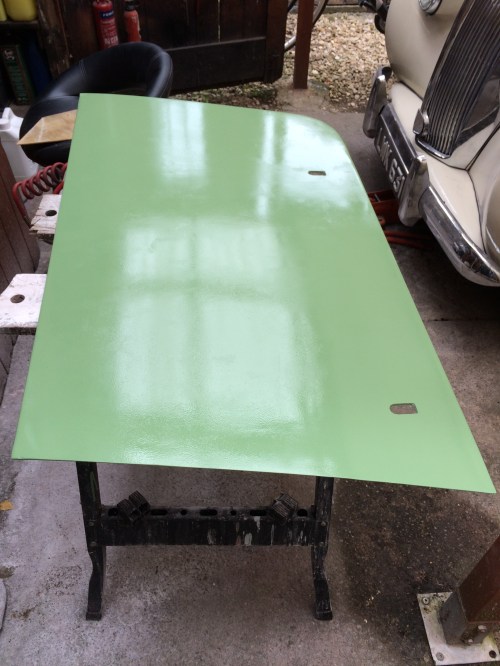
Whilst exercising the dogs in the garden, I often take a car part with me, and clean it, or paint it in between throwing a ball or playing tug of war. Using this method I have painted many small parts, and a couple of larger ones, including the timing chain cover and the bonnet and its side panels, which have now had several coats of paint. I hand paint my pre war cars using coach paint applied with a small roller. This method provides many advantages for the ‘do it yourself’ restorer; the car may be painted one panel at a time, cleanup is very quick, and the paint does not have an unpleasant smell. If you have ever spray painted a car at home you will be well aware of the pervasive odour, something the neighbours will certainly have noticed, (not just the ones next door). Another massive advantage is that the paint is relatively cheap, and a change of mind about your chosen colour will not impact the wallet dramatically. I chose a shade of green, which, once I had applied to one side of the car, didn’t like. I really wanted something lighter, so added white in stages until I got to the shade I was happy with. The entire car is now painted and looks lovely, the finish will improve with age, as the car will be polished once the paint has hardened, this takes a lot longer than cellulose or twin pack paints), I usually leave the panels for several weeks, or months before polishing.
In January 2022 the Lanchester was 90 years of age, when I bought the coupe 2016 I thought it would be nice to be driving the car by its 90th birthday, I am sure that you must be wondering if this happened. Unfortunately it was not to be; other projects and life in general got in the way, however looking back I can see a lot of progress has been made. Unfortunately a change in my home circumstances means that the restoration of this car is unlikely to go ahead for a long time, as a result I have decided to sell the car, with a bit of enthusiasm and some time and patience, the Lanchester could be on the road in a short time.