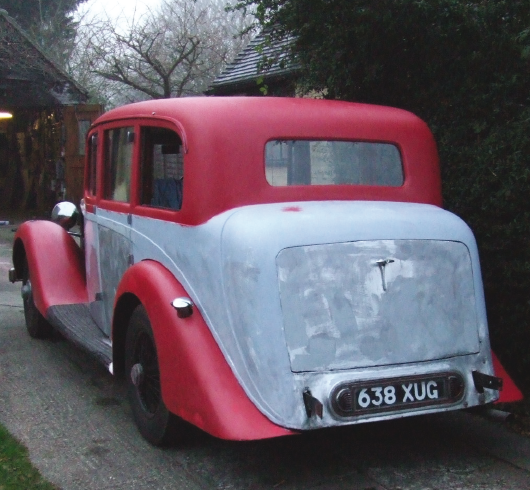
Although originality is a desirable feature, when paintwork gets to this condition it can only be stripped off and re-finished.
If you are contemplating a restoration project, one thing is for certain, the bodywork will take a lot longer to repair and cost a lot more than you anticipated. It is one area where corners simply cannot be cut. An otherwise excellent car will be badly compromised by a poor paint finish, the cosmetic appearance devalues a car more so than any other single failing. Bodywork repairs are expensive because they are so time consuming, but some, if not all of the work, can be carried out by the home restorer. If you enjoy ‘do it yourself’, consider taking on part, if not all of this job. If the car is to be properly re-finished it will require a bare metal respray, preparing a car is one area that anyone with a little spare time can tackle. Why pay the paintshop £50 an hour to strip paint? You can certainly do this yourself. The most effective home method is chemical stripping, Nitromors is an excellent product but must be used in accordance with the instructions. How many of us are guilty of using this product (and others), without first reading the instructions, and how many of us have not been particularly pleased with the result?
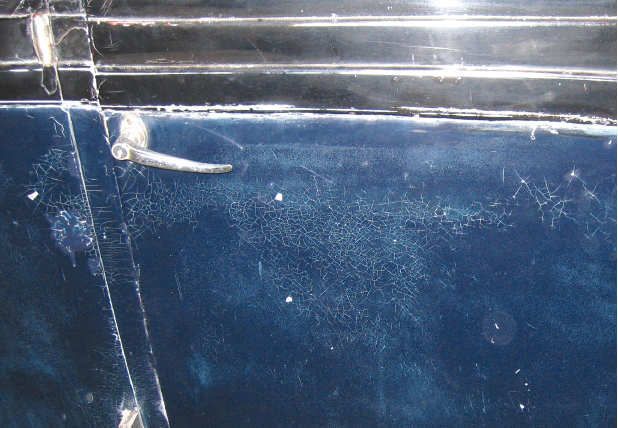
The photograph at the top pf the page flatters to deceive, the paint was flaking over all of the alloy panels.
The first thing to do is wash the car, if any paintwork is loose or flaking, scrape it off. Next arm yourself with an old paintbrush, a large tin of Nitromors, a good paint-scraper, a roll of wire wool, protective gloves, goggles and a bucket of water. Tackle one panel at each session and concentrate on stripping only around half a square yard at a time. On the EL24 I started on the roof and worked my way down, this method I found very successful and, by breaking it down into manageable sections, it seemed less daunting – an EL24 limousine is about the same size as a small apartment and it is easy to become overawed by the sheer scale of the project. Having started this restoration, which is the biggest I have yet tackled, I am now full of admiration for anyone who takes on the renovation of a commercial vehicle!
First pour some paint stripper into a suitable container and using a fairly stiff brush, stipple the chemical onto the paint, leave for about five minutes but do not be tempted to strip the paint yet. Apply a second coat of stripper, working it into any bubbles that have appeared and leave for another ten minutes. The paint should now be lifting, try to gently scrape a small area off, if the paint is reluctant to shift, apply another coat and leave for another ten minutes. Again try to scrape off the paint, it should easily and cleanly lift away from the bodywork. Try not to rush this part, whilst the paint is moist and supple it will come off leaving little residue and the stripping tool will not dig in to the surface, causing damage to soft alloy. Do not skimp on the amount of paint stripper you use, it may seem expensive at around £25 a gallon but you will be saving so much more in labour costs. Tackle only small areas at a time, allow the chemical to completely soften the paint before attempting to strip if off.
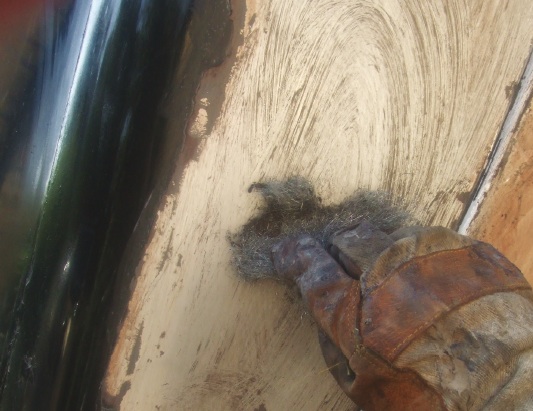
Using wire wool soaked with paint stripper, remove the stubborn spots.
When you have removed all of the paint, any damage to the body should be repaired, this may also be achieved at home, any dents should be gently tapped out using a small hammer and dolly. A skim of filler should then be applied to the repair, buy the best quality fillers – there are ones appropriate for steel and aluminium, use the correct type, the cost of using the best materials is once again offset by not paying massive labour charges.
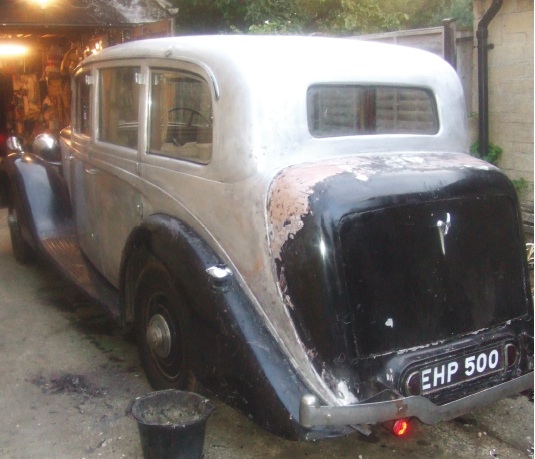
Tackling small areas at a time, the car eventually becomes clear of paint.
Always ensure the work area is spotlessly clean and keep any silicone products away from the car, they will drift through the atmosphere and settle on the bodywork – paint and filler will not adhere to a surface contaminated with silicon. Mix just enough filler for the job and build up any large repairs using several thin coats, rather than one heavy one. Use wet’n’dry paper to shape and smooth off. The repair of any dent is a time consuming task, there are no real short cuts, it is just a matter of filling, flatting back, checking the contour and filling again.
‘Acid etch’ then high build primer is applied.
Once you have got the repair to a point where you are sure it is good, paint the area with primer (always use etch primer on alloy panels and re-apply if you break through when flatting back, failure to do so will result in your paint finish blistering). With the panel in primer you will see a few more dips and bumps, rough up the area requiring more attention, spread the filler, leave to go hard then flat off again, this process should be repeated until you are happy with the result.
Fillers and stoppers can ‘sink’ and extra time spent on this part of the job will pay dividends. I often fill the repair area and leave overnight (or longer) before going back to flat off, I also like to finish a session by painting the repair with primer, or even in the finish colour, I know then that if I can not get back to working on the car for a while, little damage can be caused by any damp that might be in the atmosphere. Upon returning to the car I run my hand over the repaired sections, this shows up dips and bumps which are often invisible to the ‘naked eye’. I then apply a red high build, anti corrosive primer, using a 4 inch roller, this gets the primer on fast enough to prevent the dragging you would experience if applying with a brush, and conceals any light scratches and small defects caused by the paint stripping process.
Any welding repairs should also be taken care of, if you are unable to carry out this job there are plenty of ‘mobile’ welders who will. Once the repairs have been made, grind back any high spots and treat the repair as a dent using filler as described above. The method I have found ideally suited to home restoration is to use a brushing paint, ICI ‘synthetic coach paint’ is available from good paint factors. This product may be spray or hand painted, if choosing the latter it is beneficial to buy a ‘brush painting activator’ (an additive which slows the drying process and encourages the paint to spread across the surface).

Application of the paint is also tackled a panel at a time.
There are several advantages in using a brushing paint; one panel at a time may be tackled, which means the car need not be disabled for any length of time, all of the paint goes on the car, not into the atmosphere, cleaning a brush is so much quicker than cleaning down a spray kit and there is no need to mask up. The trick to a good finish when using this method is in the flatting back and polishing, this is what puts many proficient sprayers off coach-painting, it is of course time consuming However the time spent can be spread over many months and the end result, given time and patience is indistinguishable from a spray painted finish. The skill involved in brushing on the paint and the quality of the brushes used will not necessarily give a better finish but will certainly save time when flatting and polishing. Once again if doing it yourself, do not skimp on the amount of paint and primer you buy and use, the cost is but a fraction of the price of a professional respray. You can afford to make many mistakes – even down to choosing the wrong colour. It is extremely difficult to gauge the colour from a tiny paint chip. Have you ever painted a room at home having chosen the colour from a chart, and been disappointed with the result? Mid red becomes bright pink, pale primrose becomes dayglow yellow, exactly the same happens with car paint.

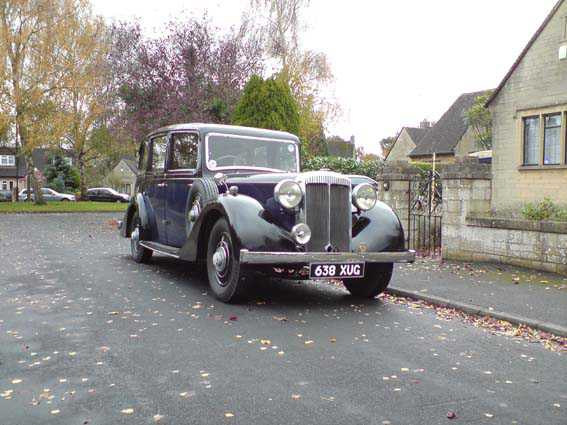
Painted but not yet polished, the result is already very pleasing to the eye.
Another benefit brought about by doing it yourself, is that a whole painted panel will certainly give an indication as to whether you have made the right choice, if not, you have the option to change your mind without breaking the bank, a litre of synthetic coachpaint goes a long way and the cost equates to about half an hours labour charge (don’t be afraid to experiment or to add white or black to change the shade if you are unhappy with the finished colour). Once the panel is painted in primer the next step is to give a very light coat of the finish colour. Once dry, flat this back with wet’n’dry, any colour left on the panel is a low spot and will require more filler or stopper, repeat this procedure until after flatting back, no coloured high spots are left. Now you can apply the first proper coat of paint, I mix a useable amount of paint and activator in a wide necked jam jar, this keeps the remainder of the paint in the tin fresh and clean. The paint is applied using up and down then left and right strokes, finally finishing by running the brush in the direction which you would usually look along. If a hair comes out of the brush or a large piece of debris contaminates the surface, the slow drying nature of the paint allows time to work it out, however specks of dust and small insects which inevitably find their way onto the surface, are best left and polished out when the paint dries.
Painted car setting off from Frenchay to the NEC.
Once dry, the paint is flatted back with wet’n’dry paper then another coat is applied, this process is repeated until I am happy with the amount of paint applied and with the finish I have achieved. Finally the paint is ‘flatted back’ with fine wet’n’dry, then T-cut followed by car polish.
I cannot overstate the advantage of being able to break the job down into small sections, my EL24 has been out to many shows and events with the paint is various stages of completion, once back at home it is a simple matter of washing down, flatting back and applying more paint!
I have experimented with many types of brush, with best results from a one and a half inch wide, artists ‘wash’ brush (available from Hobbycraft or any good art shop). Any brush may be used, even cheap d.i.y ones but the better brushes leave less marks, requiring less time flatting back before polishing. Another excellent method which works particularly well is to use a 4 inch paint roller (these are available for just a few pounds including a tray from B&Q). I have experimented with the different types on sale, and found little to choose between the most expensive lambs wool and the cheapest foam rollers. The advantage a roller has over a brush is the time saved on a large panel such as the roof. Do not be too bothered about cleaning the roller out after use (which takes forever and uses gallons of thinners), I part fill large jam jars with cheap fast-thinners and leave the rollers to soak, rolling out excess thinners on paper before re-using (they are cheap enough to throw away after a couple of coats have been applied). Before using new rollers (particularly lambs wool) or brushes, thoroughly wash them to prevent any loose material from contaminating your work. Foreign bodies, runs and sags are easier to flat back and remove when the paint is hard and the longer the paint is left to go off, the better. I use decreasing grades of wet’n’dry, finishing with 1,200 grit paper.

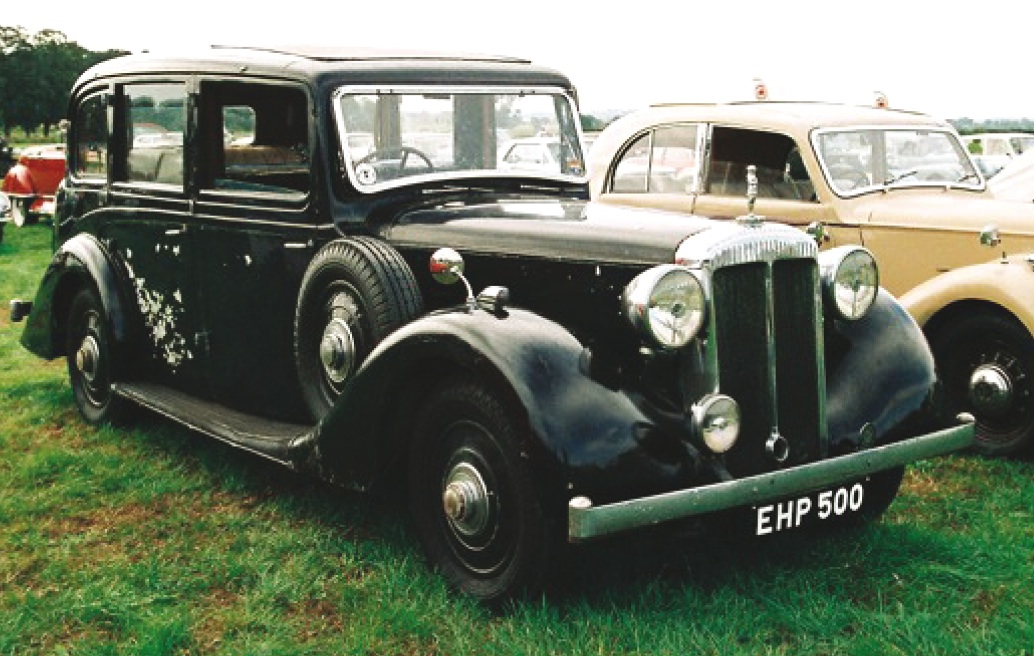
The limousine seen here at Shelsley Walsh Hill Climb.
If you are unsure of quantities required or the correct types of filler and thinners, or which sort of cutting compound to use, don’t be frightened to ask at the paint shop – my experience is that they are always willing to give advice and will happily calculate the amounts required. I find it is best to buy fast thinners (useful for brush cleaning) and high build primer in 5 litre cans and etch primer, brushing activator and paint in one litre tins (the paint is less likely to ‘skin’). Buy too much paint rather than too little, it is not the end of the world if you have a litre left over, it is always handy to have an exact match in case of damage being caused to the car. It is worth mentioning that synthetic coach paint can be applied over almost any surface, if your car does not require a bare metal repaint, the existing paint should be rubbed back to provide a good key, repairs effected and simply brush or roll painted. I have used ICI products but other manufacturers produce similar products. The cost of stripping and painting this large car, including all of the chemical stripper, fillers, paint, abrasives and polish came to just a few hundred pounds.
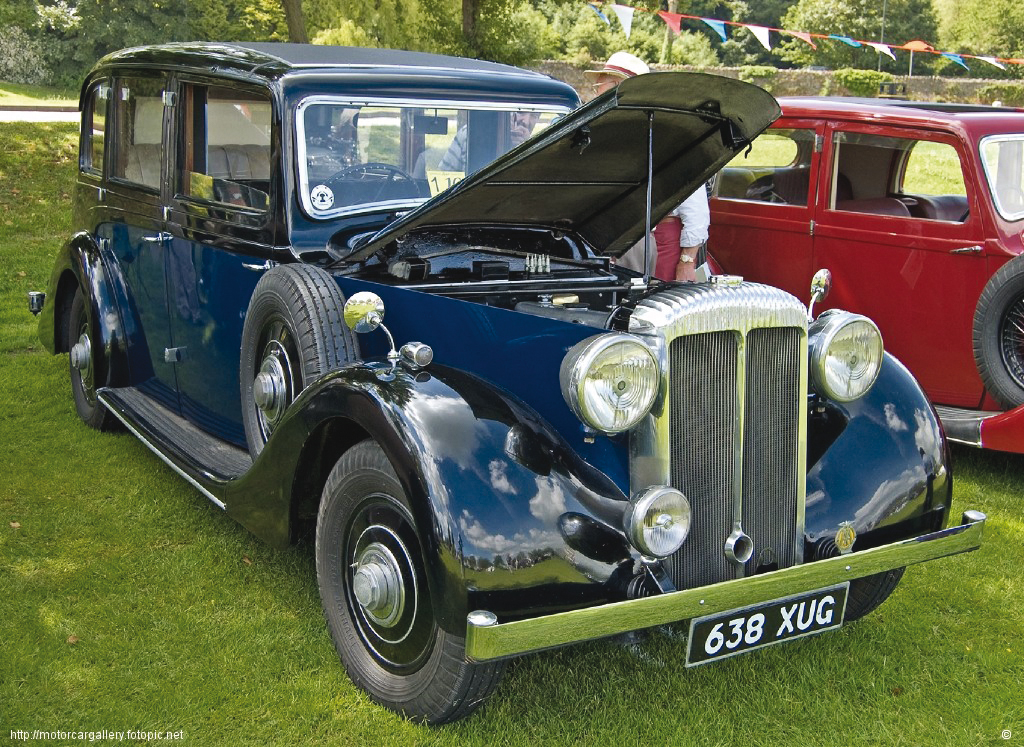
DLOC International Rally Ross on Wye.
I subsequently travelled many miles in this beautiful limousine and attended numerous events, there were no brush marks and no evidence that the car had been brush and roller painted. When the car was subsequently advertised, the garage commissioned to handle the sale on my behalf published the fact that it had been re-sprayed, I had to correct their advert to ‘re-painted’! (see also Daimler EL24 Charlesworth limousine 1939).
If you would like to know more about hand painting a car please contact me using the form below.


